


材料:
LED灯带
红外感应器
舵机
UNO板
面包板
杜邦线若干
细铁丝
粗木棒
棉线
牙签(建议用末端为平底的牙签)
3D打印
5mm木板
制作过程:
PART 1:外观制作
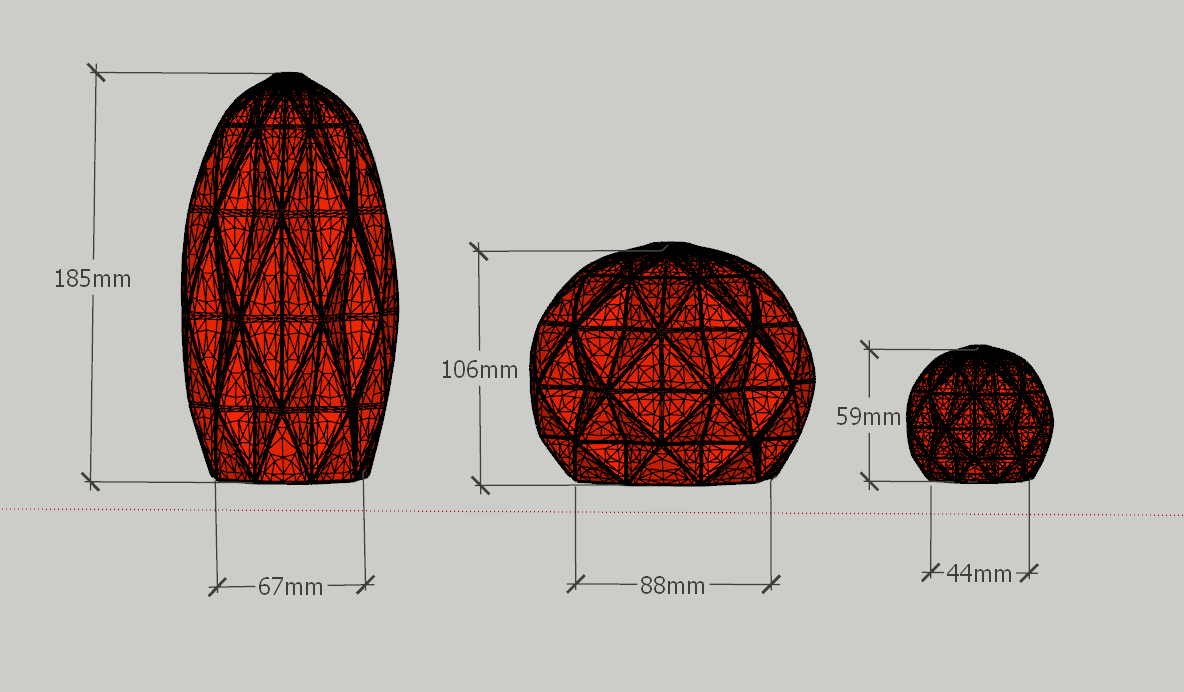
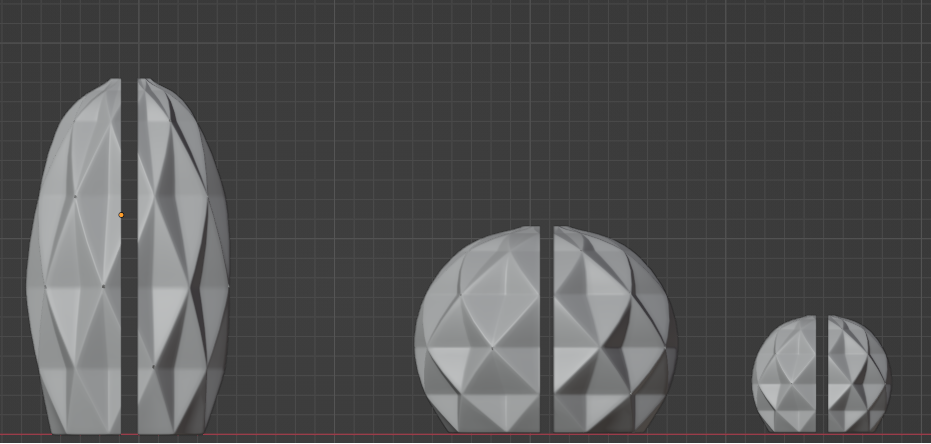
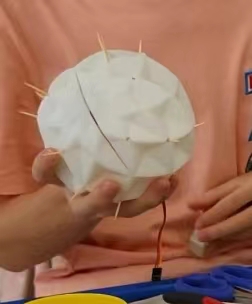
在blender里进行建模和调整,做出仙人掌的模样(仙人掌尺寸如图)。
提醒:1需要在仙人掌上预留出约5mm的洞以便刺的安装和活动,洞的数量可以根据需求自行调整,这里每个仙人掌各留了19个洞。2建议把仙人掌分成左右两半,等内部结构安装好后,用AB胶粘合。
模型建好后,进行3D打印,这里用的3D打印材料为乳白色,壁厚3mm,太厚不好透光,太薄太脆容易支撑不住。
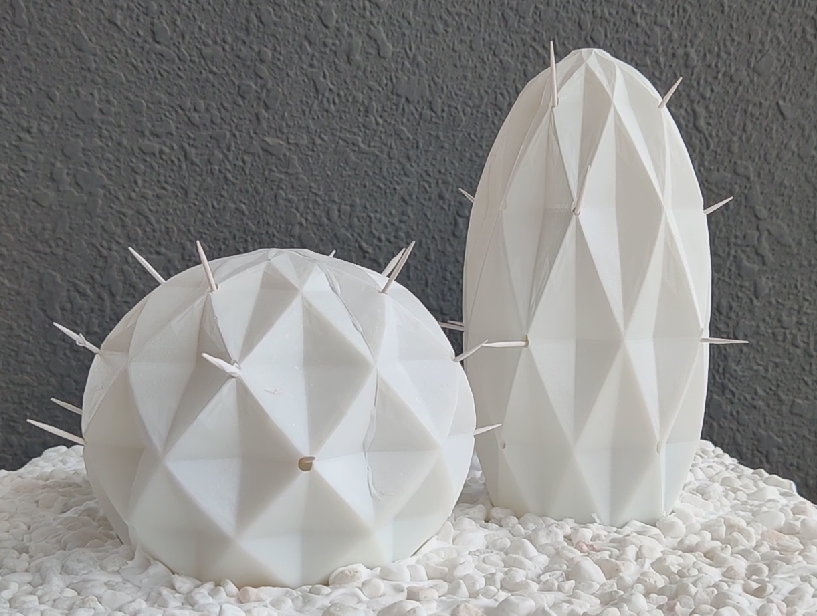
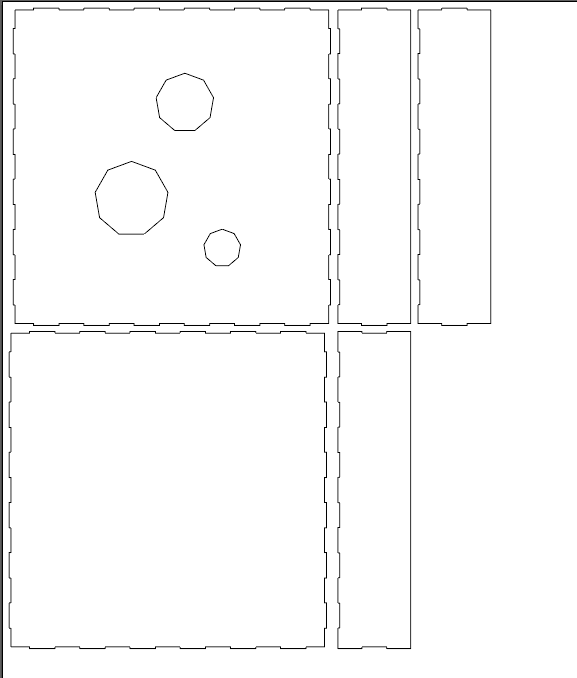
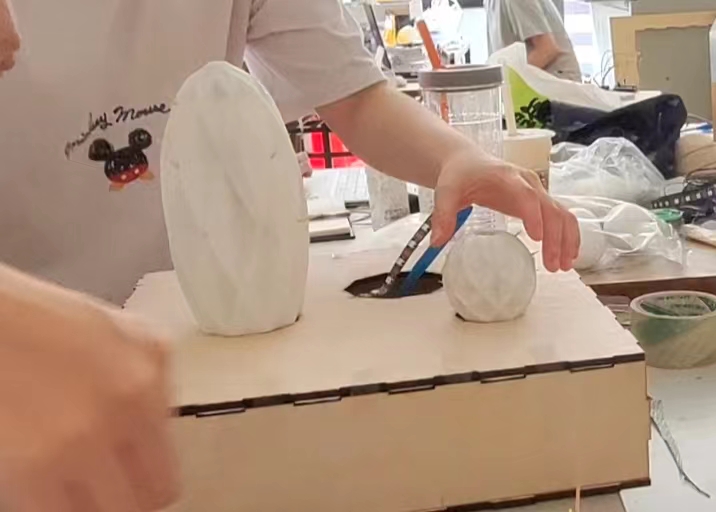
将三个仙人掌定好位置,在底座挖好洞,以便安装内部装置。
底座的木板做好厚一点,承重效果好,这里建议用5mm木板去激光切割。这里为了方便后续组装,在侧面开了一个口,不是完整的六面体。盒子不用自己做,可以自动生成,网址如下:https://www.makercase.com/#/basicbox
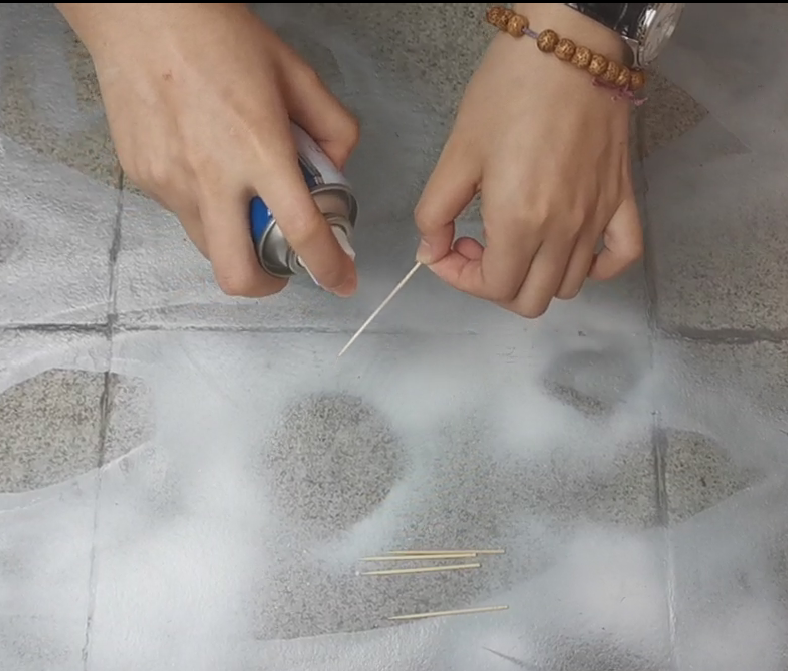
用牙签作为仙人掌的刺。先用白色哑光喷漆把牙签喷好,建议戴手套。
前期工作准备好后,开始安装内部结构和代码。
PART 2:内部制作
红外LED灯带制作:
代码如下:
#include <FastLED.h>
/** BASIC CONFIGURATION **/
//The amount of LEDs in the setup
#define NUM_LEDS 350
//The pin that controls the LEDs
#define LED_PIN 6
//The pin that we read sensor values form
#define ANALOG_READ 0
//Confirmed microphone low value, and max value
#define MIC_LOW 500
#define MIC_HIGH 700.0
/** Other macros */
//How many previous sensor values effects the operating average?
#define AVGLEN 5
//How many previous sensor values decides if we are on a peak/HIGH (e.g. in a song)
#define LONG_SECTOR 20
//Mneumonics
#define HIGH 3
#define NORMAL 2
//How long do we keep the "current average" sound, before restarting the measuring
#define MSECS 30 * 1000
#define CYCLES MSECS / DELAY
/*Sometimes readings are wrong or strange. How much is a reading allowed
to deviate from the average to not be discarded? **/
#define DEV_THRESH 0.8
//Arduino loop delay
#define DELAY 1
float fscale( float originalMin, float originalMax, float newBegin, float newEnd, float inputValue, float curve);
void insert(int val, int *avgs, int len);
int compute_average(int *avgs, int len);
void visualize_music();
//How many LEDs to we display
int curshow = NUM_LEDS;
/*Not really used yet. Thought to be able to switch between sound reactive
mode, and general gradient pulsing/static color*/
int mode = 0;
//Showing different colors based on the mode.
int songmode = NORMAL;
//Average sound measurement the last CYCLES
unsigned long song_avg;
//The amount of iterations since the song_avg was reset
int iter = 0;
//The speed the LEDs fade to black if not relit
float fade_scale = 1.2;
//Led array
CRGB leds[NUM_LEDS];
/*Short sound avg used to "normalize" the input values.
We use the short average instead of using the sensor input directly */
int avgs[AVGLEN] = { -1};
//Longer sound avg
int long_avg[LONG_SECTOR] = { -1};
//Keeping track how often, and how long times we hit a certain mode
struct time_keeping {
unsigned long times_start;
short times;
};
//How much to increment or decrement each color every cycle
struct color {
int r;
int g;
int b;
};
struct time_keeping high;
struct color Color;
void setup() {
Serial.begin(9600);
//Set all lights to make sure all are working as expected
FastLED.addLeds<NEOPIXEL, LED_PIN>(leds, NUM_LEDS);
for (int i = 0; i < NUM_LEDS; i++)
leds[i] = CRGB(255, 0, 0);
FastLED.show();
delay(500);
//bootstrap average with some low values
for (int i = 0; i < AVGLEN; i++) {
insert(250, avgs, AVGLEN);
}
//Initial values
high.times = 0;
high.times_start = millis();
Color.r = 255;
Color.g = 0;
Color.b = 0;
}
/*With this we can change the mode if we want to implement a general
lamp feature, with for instance general pulsing. Maybe if the
sound is low for a while? */
void loop() {
switch (mode) {
case 0:
visualize_music();
break;
default:
break;
}
delay(DELAY); // delay in between reads for stability
}
/**Funtion to check if the lamp should either enter a HIGH mode,
or revert to NORMAL if already in HIGH. If the sensors report values
that are higher than 1.1 times the average values, and this has happened
more than 30 times the last few milliseconds, it will enter HIGH mode.
TODO: Not very well written, remove hardcoded values, and make it more
reusable and configurable. */
void check_high(int avg) {
if (avg > (song_avg / iter * 1.1)) {
if (high.times != 0) {
if (millis() - high.times_start > 200.0) {
high.times = 0;
songmode = NORMAL;
} else {
high.times_start = millis();
high.times++;
}
} else {
high.times++;
high.times_start = millis();
}
}
if (high.times > 30 && millis() - high.times_start < 50.0)
songmode = HIGH;
else if (millis() - high.times_start > 200) {
high.times = 0;
songmode = NORMAL;
}
}
//Main function for visualizing the sounds in the lamp
void visualize_music() {
int sensor_value, mapped, avg, longavg;
//Actual sensor value
sensor_value = analogRead(ANALOG_READ);
//If 0, discard immediately. Probably not right and save CPU.
if (sensor_value == 0)
return;
//Discard readings that deviates too much from the past avg.
mapped = (float)fscale(MIC_LOW, MIC_HIGH, MIC_LOW, (float)MIC_HIGH, (float)sensor_value, 2.0);
avg = compute_average(avgs, AVGLEN);
if (((avg - mapped) > avg * DEV_THRESH)) //|| ((avg - mapped) < -avg*DEV_THRESH))
return;
//Insert new avg. values
insert(mapped, avgs, AVGLEN);
insert(avg, long_avg, LONG_SECTOR);
//Compute the "song average" sensor value
song_avg += avg;
iter++;
if (iter > CYCLES) {
song_avg = song_avg / iter;
iter = 1;
}
longavg = compute_average(long_avg, LONG_SECTOR);
//Check if we enter HIGH mode
check_high(longavg);
if (songmode == HIGH) {
fade_scale = 3;
Color.r = 5;
Color.g = 3;
Color.b = -1;
}
else if (songmode == NORMAL) {
fade_scale = 2;
Color.r = -1;
Color.b = 2;
Color.g = 1;
}
//Decides how many of the LEDs will be lit
curshow = fscale(MIC_LOW, MIC_HIGH, 0.0, (float)NUM_LEDS, (float)avg, -1);
/*Set the different leds. Control for too high and too low values.
Fun thing to try: Dont account for overflow in one direction,
some interesting light effects appear! */
for (int i = 0; i < NUM_LEDS; i++)
//The leds we want to show
if (i < curshow) {
if (leds[i].r + Color.r > 0)
leds[i].r = 255;
else if (leds[i].r + Color.r < 0)
leds[i].r = 255;
else
leds[i].r = leds[i].r + Color.r;
if (leds[i].g + Color.g > 0)
leds[i].g = 0;
else if (leds[i].g + Color.g < 0)
leds[i].g = 0;
else
leds[i].g = leds[i].g + Color.g;
if (leds[i].b + Color.b > 0)
leds[i].b = 0;
else if (leds[i].b + Color.b < 0)
leds[i].b = 0;
else
leds[i].b = leds[i].b + Color.b;
//All the other LEDs begin their fading journey to eventual total darkness
} else {
leds[i] = CRGB(leds[i].r / fade_scale, leds[i].g / fade_scale, leds[i].b / fade_scale);
}
FastLED.show();
}
//Compute average of a int array, given the starting pointer and the length
int compute_average(int *avgs, int len) {
int sum = 0;
for (int i = 0; i < len; i++)
sum += avgs[i];
return (int)(sum / len);
}
//Insert a value into an array, and shift it down removing
//the first value if array already full
void insert(int val, int *avgs, int len) {
for (int i = 0; i < len; i++) {
if (avgs[i] == -1) {
avgs[i] = val;
return;
}
}
for (int i = 1; i < len; i++) {
avgs[i - 1] = avgs[i];
}
avgs[len - 1] = val;
}
//Function imported from the arduino website.
//Basically map, but with a curve on the scale (can be non-uniform).
float fscale( float originalMin, float originalMax, float newBegin, float
newEnd, float inputValue, float curve) {
float OriginalRange = 0;
float NewRange = 0;
float zeroRefCurVal = 0;
float normalizedCurVal = 0;
float rangedValue = 0;
boolean invFlag = 0;
// condition curve parameter
// limit range
if (curve > 10) curve = 10;
if (curve < -10) curve = -10;
curve = (curve * -.1) ; // - invert and scale - this seems more intuitive - postive numbers give more weight to high end on output
curve = pow(10, curve); // convert linear scale into lograthimic exponent for other pow function
// Check for out of range inputValues
if (inputValue < originalMin) {
inputValue = originalMin;
}
if (inputValue > originalMax) {
inputValue = originalMax;
}
// Zero Refference the values
OriginalRange = originalMax - originalMin;
if (newEnd > newBegin) {
NewRange = newEnd - newBegin;
}
else
{
NewRange = newBegin - newEnd;
invFlag = 1;
}
zeroRefCurVal = inputValue - originalMin;
normalizedCurVal = zeroRefCurVal / OriginalRange; // normalize to 0 - 1 float
// Check for originalMin > originalMax - the math for all other cases i.e. negative numbers seems to work out fine
if (originalMin > originalMax ) {
return 0;
}
if (invFlag == 0) {
rangedValue = (pow(normalizedCurVal, curve) * NewRange) + newBegin;
}
else // invert the ranges
{
rangedValue = newBegin - (pow(normalizedCurVal, curve) * NewRange);
}
return rangedValue;
}
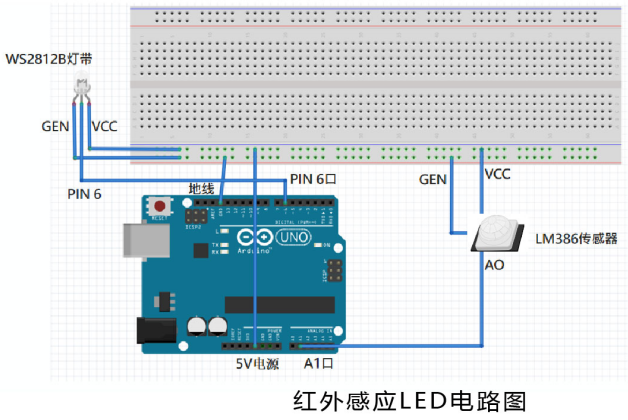
电路图如下:
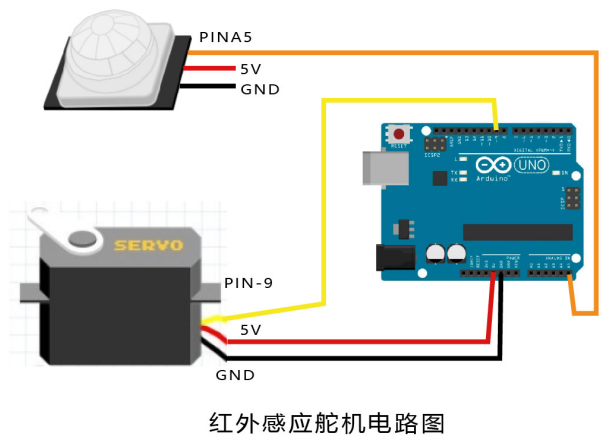
红外舵机制作:
代码如下:
#include <Servo.h> //调用库文件
Servo myservo; // 创建一个伺服电机对象
int angle1 = 0; //原始角度值
int angle2 = 180; //旋转角度值
int Sensor_pin = A5;
void setup()
{
pinMode(Sensor_pin,INPUT); //设置人体红外接口为输入状态
myservo.attach(9); //定义舵机的引脚为9
Serial.begin(9600);
}
void loop()
{
int val=digitalRead(Sensor_pin); //定义参数存储人体红外传感器读到的状态
Serial.println(val);
if(val == 1) //如果检测到有人(在检测范围内)
{
myservo.write(angle2); //控制舵机转动相应的角度。
}
else
{
myservo.write(angle1); //控制舵机转动相应的角度。
}
delay(100); //延时100毫秒
}
电路图如下:
内部结构制作:
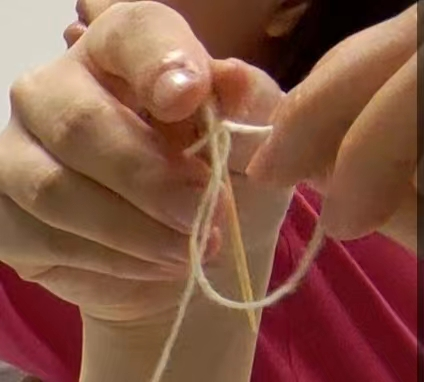
把牙签末端绑上棉绳。
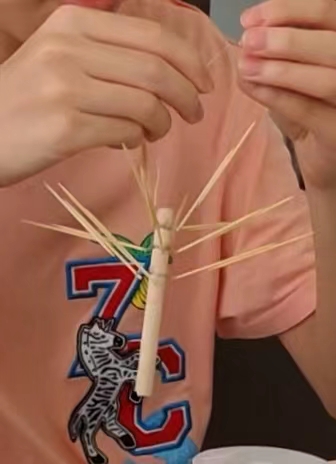
把绑好棉线的牙签绑在粗木棒上,并用细铁丝固定。不够长的牙签可以两根牙签绑在一起延长。
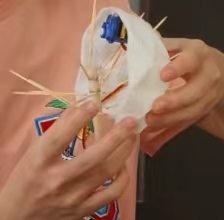
在仙人掌顶端用AB胶粘上舵机。
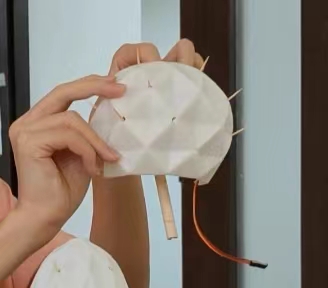
最后把两半仙人球用AB胶粘合,用胶带缠一圈静置风干。
PART 3:成品组装
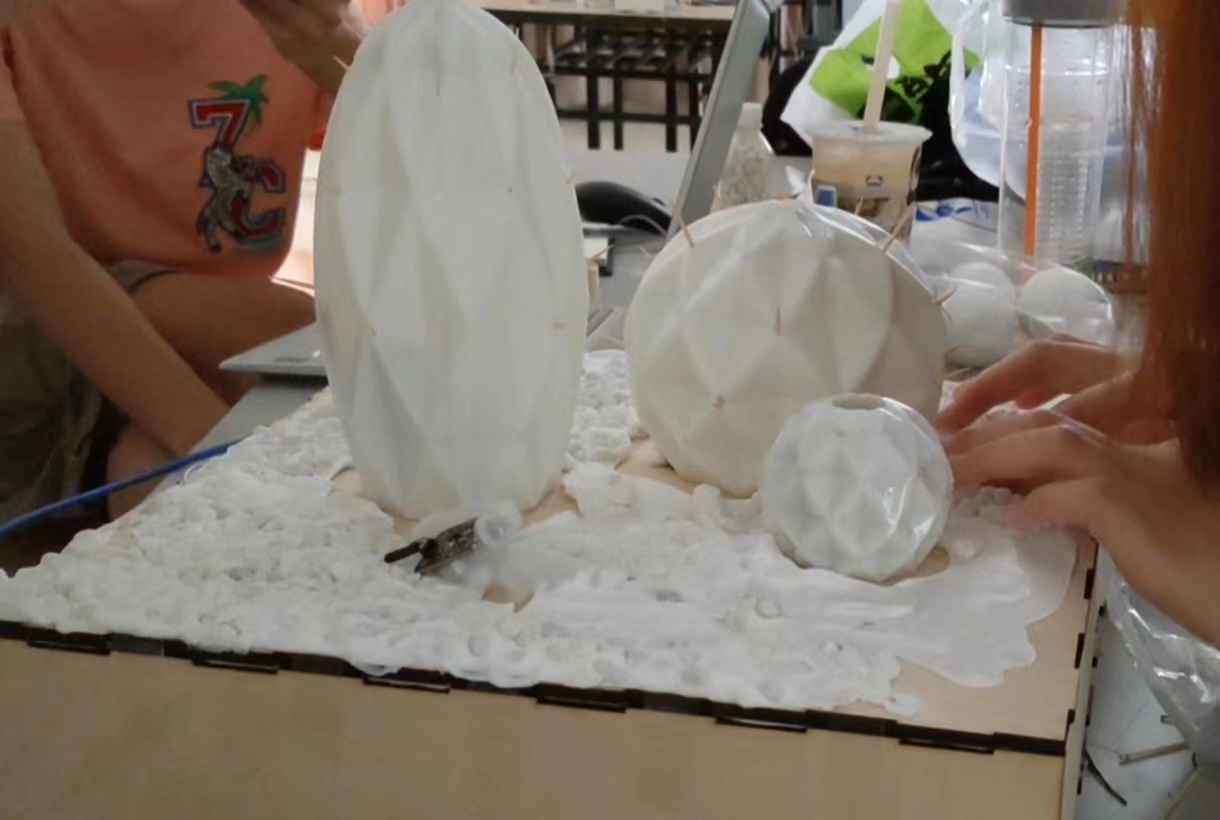
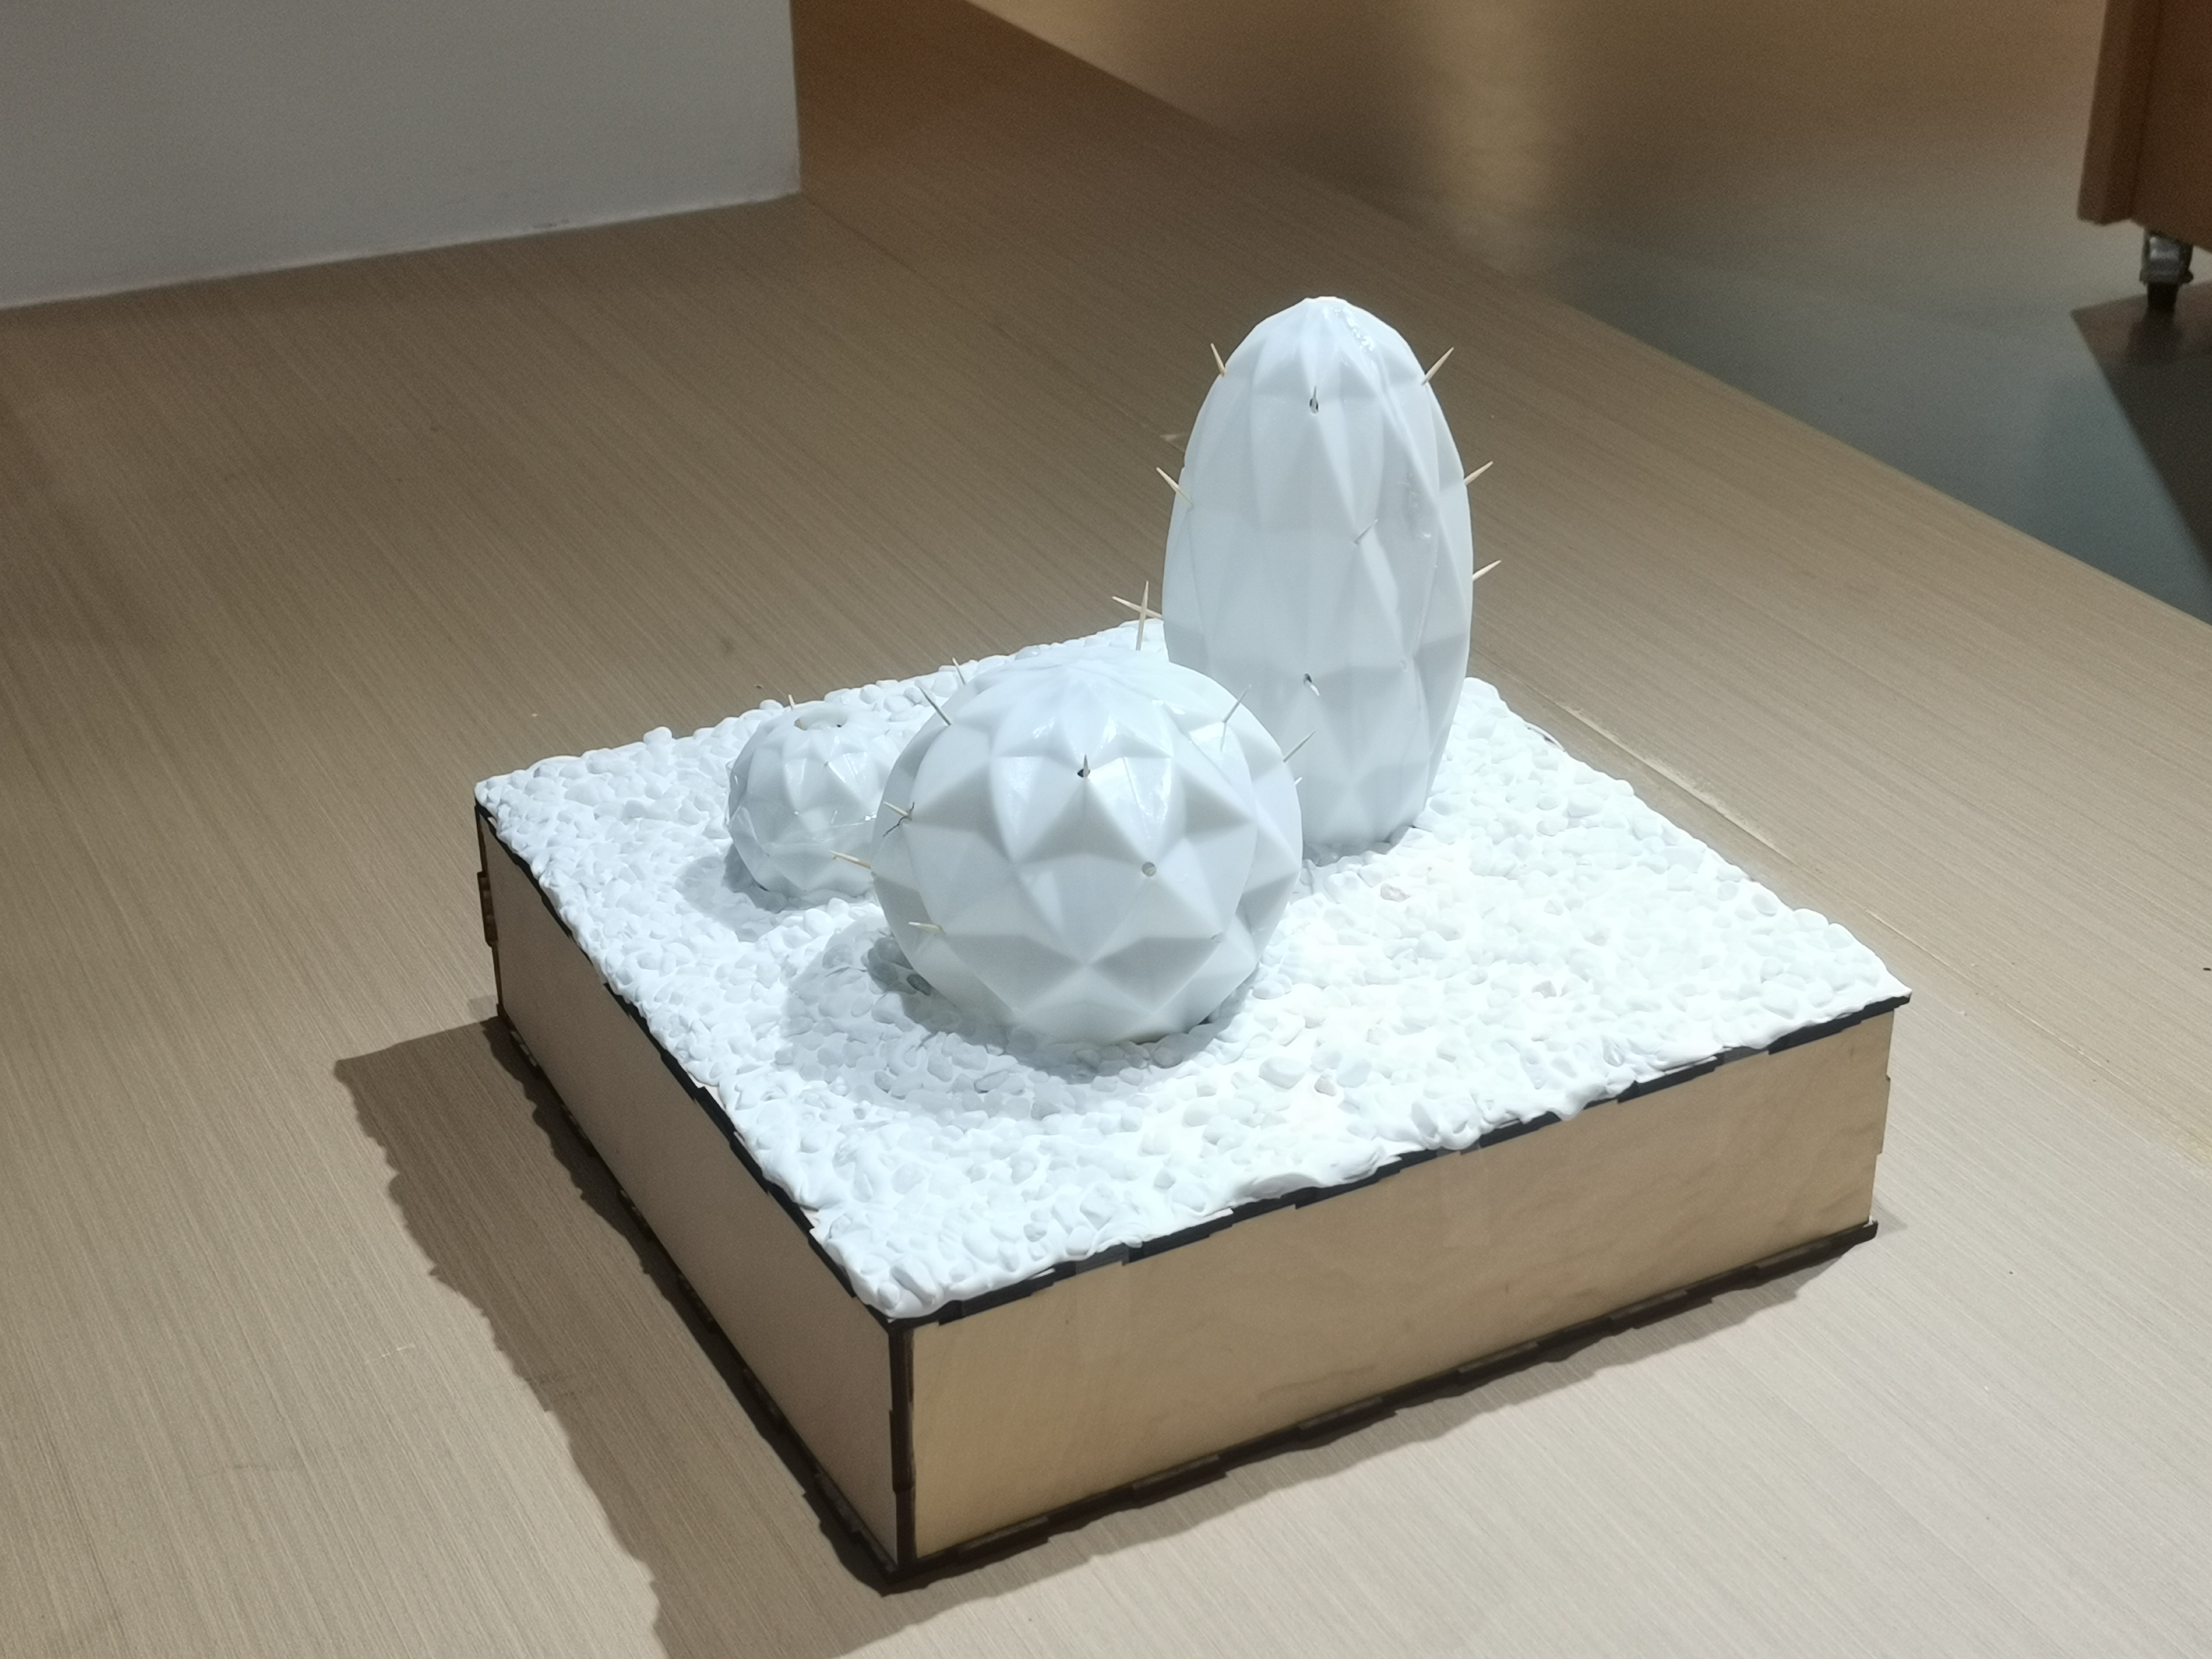
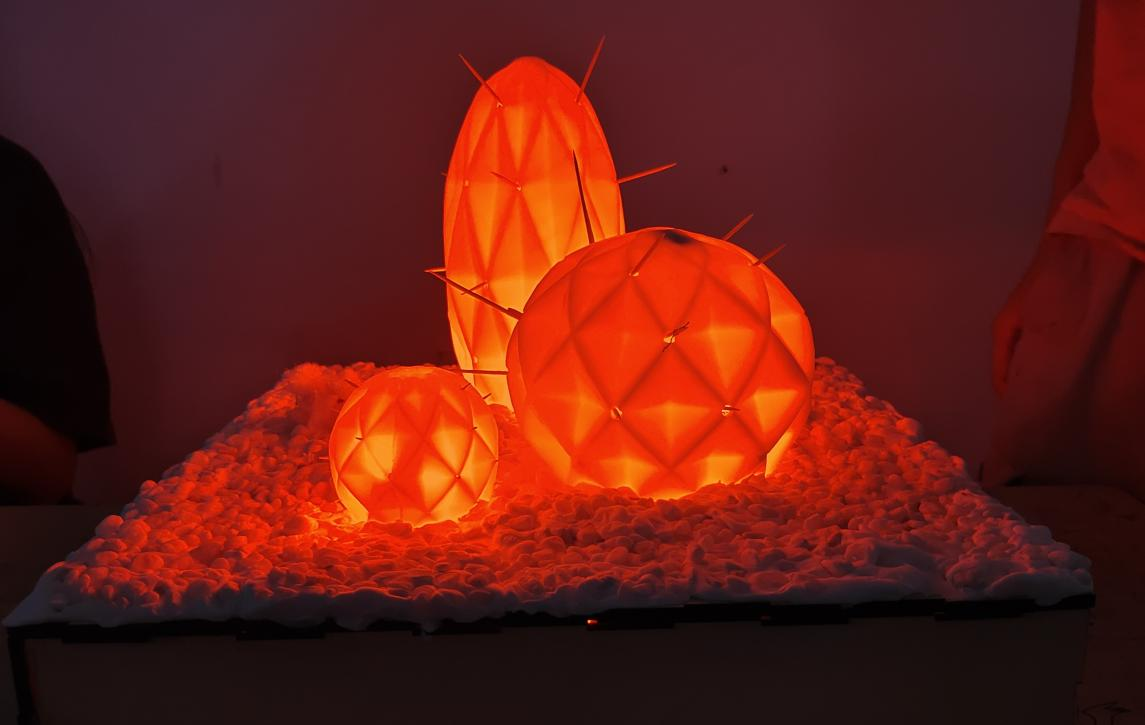
仙人掌粘好风干后,把底座组装好,再把仙人掌放到相应位置,进行最后的接线处理。这里灯带是只用了一条,把灯带置于底座内,每个仙人掌洞口处拉出一部分灯带进行分配,红外感应一个放在了最小的仙人掌里,一个在底座上。
组装好后,对底座进行装饰(此步骤可以省略或自行设计,这里用超轻黏土和白色石头进行装饰。)
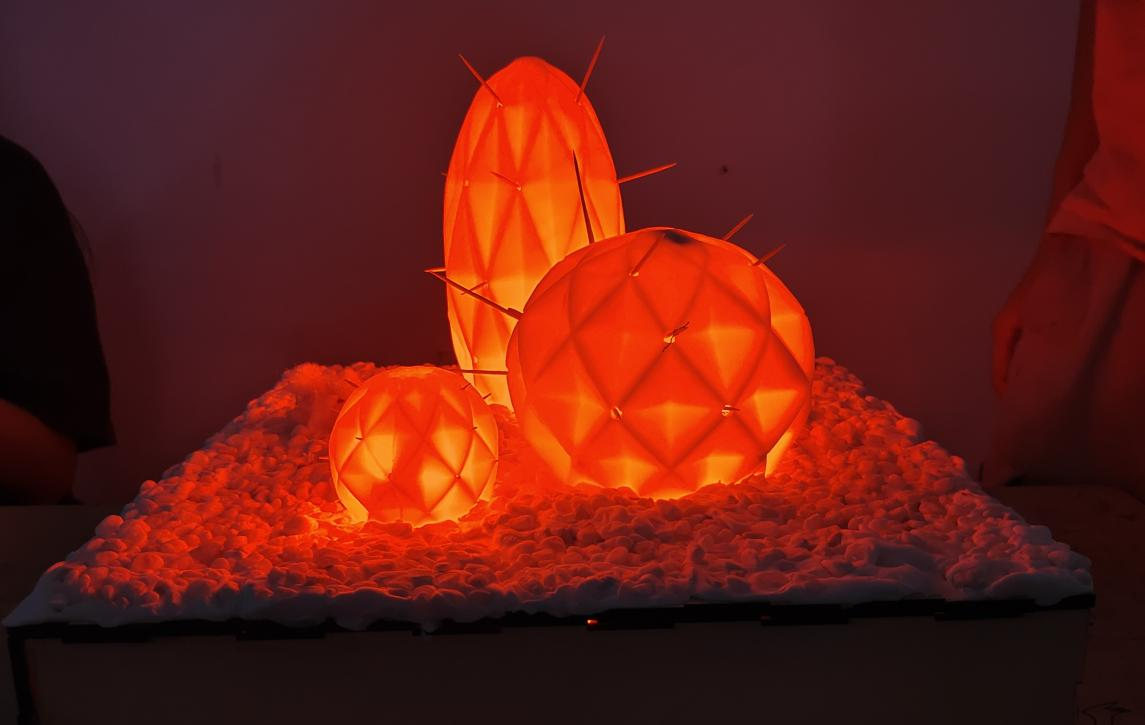
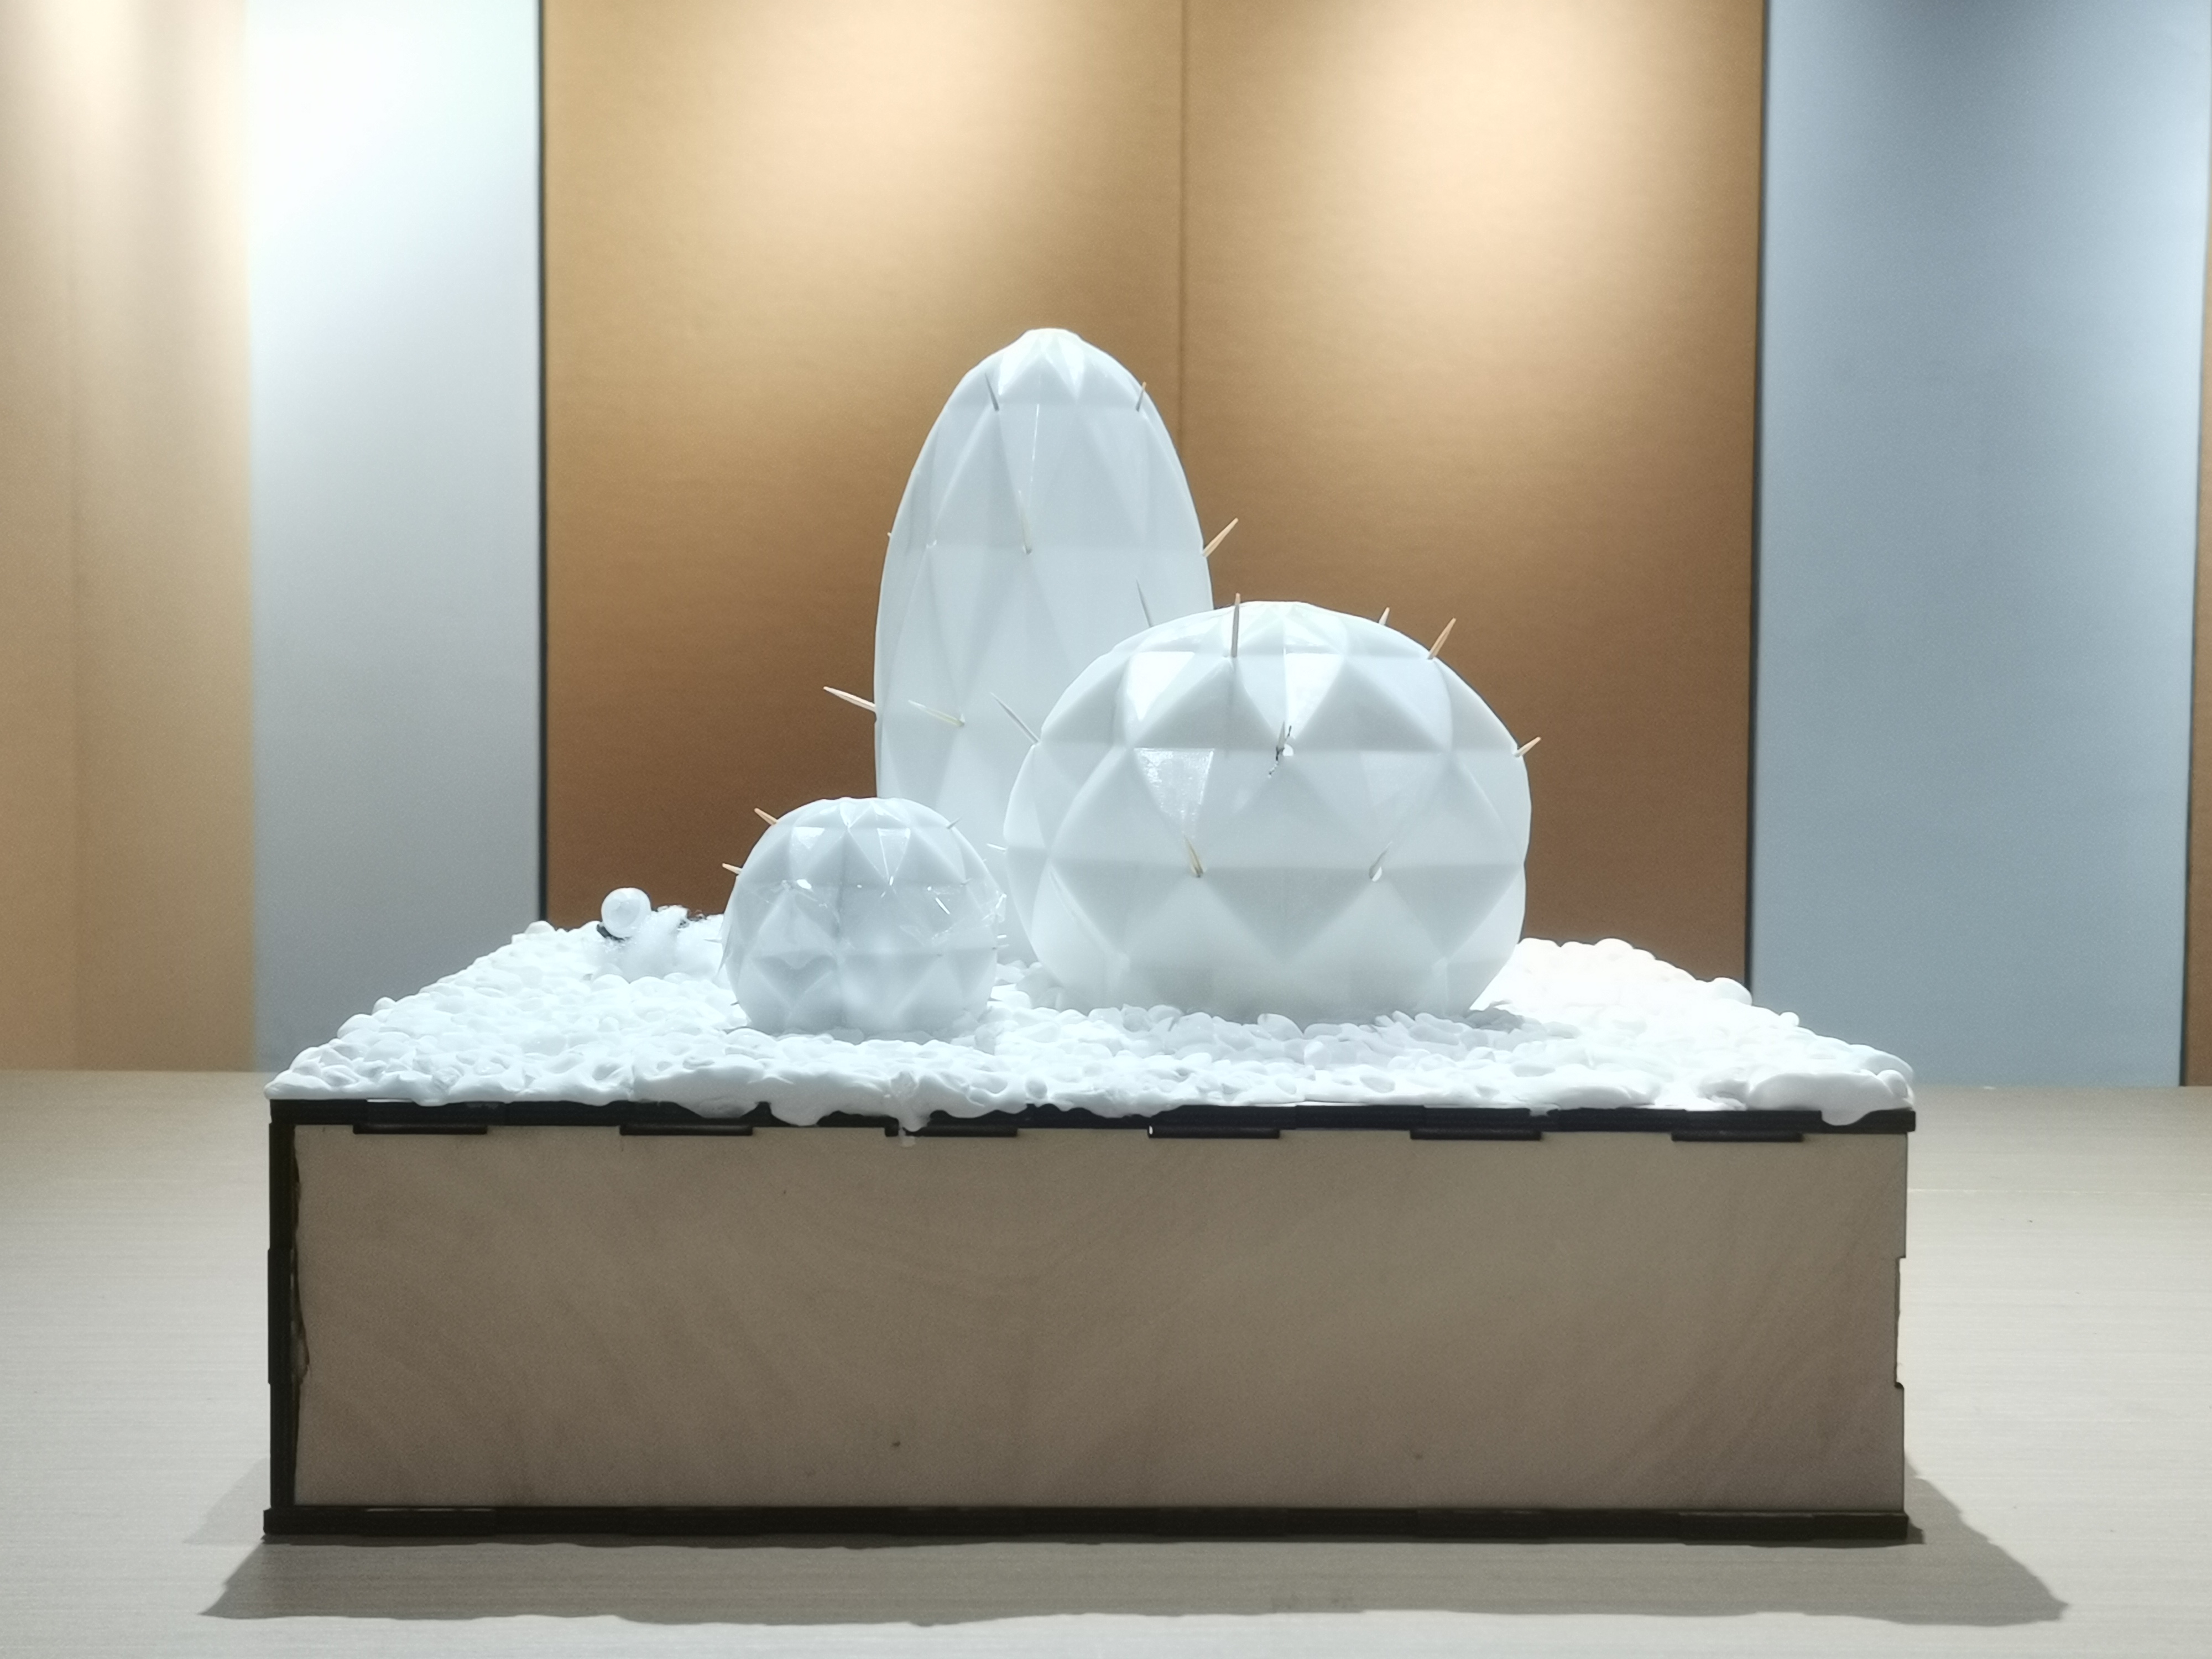
PART 4 成品展示:



 Publish
 Videos
 Articles
 Events
 EN
EN

Comments
Please Log in or Register to comment