


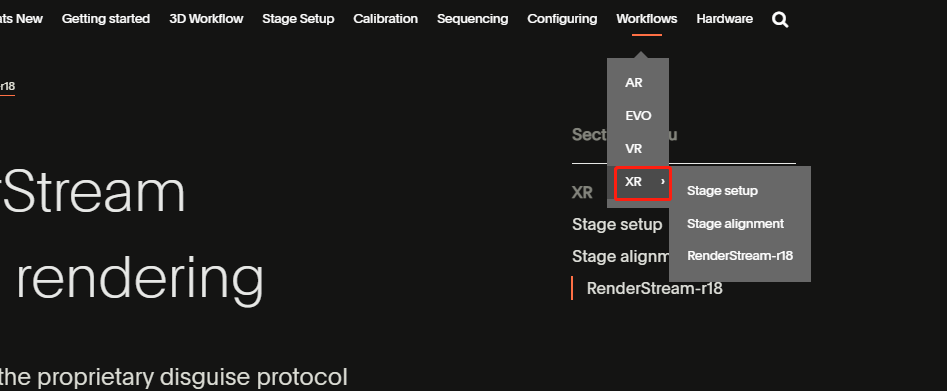
上周五Disguise更新了r18,并且更新了XR工作流的帮助文档
(就像玩游戏一样,之前这一块和上面的AR,VR一样是没有下拉菜单的,现在终于开放新地图了)
这里简单翻译了一下更新的这部分文档,如果有翻译的问题请在评论区或者私信中指出,帮助我学习与进步,谢谢各位!(另外,UE从来没有用过,也许会有一些翻译上的问题)
希望这份翻译能让大家快速过目一遍更新的内容,谢谢!
This topic will explain the basic principles of setting up a project for use with the xR workflow.
本主题将解释XR工作流下的项目设置基本原则
Create a new Disguise project if required.
如果有需要,创建一个新的Disguise项目
Configure your Director/Actor setup if required.
如果有需要,配置好你的导演机或者演员机
(需要补充的知识,d3Net,d3网络以及d3网络中,机器被分为四个角色,导演,演员,替角,编辑者,详情见链接)
Create an accurate representation of your LED setup in The Stage.
在舞台中创建一个精确的LED片场
Ensure project refresh rate and output refresh rates match
确保项目刷新率和输出刷新率匹配
Configure Genlock
配置同步锁定Genlock
Ensure feed output resolutions are configured
确保馈送输出的分辨率已配置完成
This topic covers setting up your stage and cameras in The disguise software.
本主题覆盖了如何在Disguise软件中中设置你的舞台与摄像机
添加LED屏幕到舞台中
添加摄像机到舞台中
将物理舞台摄像机的视频输出连接到视频输入video input
将视频输入video input连接到舞台中的摄像机
在视频输入patch中运行预览,以确定摄像机馈送正在被接受
检查并配置物理相机的设置
检查并配置相机追踪系统
创建一个位置接收器position receiver以连接到相机追踪系统
将相机追踪驱动添加到位置接收器
启用相机追踪驱动
将Disguise中的虚拟相机分配给相机追踪源camera tracking source
监视从相机追踪系统传入的数据
创建一个MR set
将LED屏幕添加到MR set
如果有需要,将多个摄像机添加到MR set中
如果要使用多个摄像机,配置并测试Indirection控制器
This topic covers the basic steps of how to align your stage and run calibrations for the xR workflow.
本主题覆盖了如何为xR工作流校准舞台和运行校准的基本步骤。
(这一块的内容杨剑老师的视频在一年前就讲得很清楚了,感谢普罗米修斯们!)
这是视频链接:
测试图案层设置
a. Add test pattern layer using Direct mapping to LED surface
Configure feed output to send content to LED screen
使用直接映射将测试图案层添加到LED表面
Virtual lineup层
a. Add a virtual line up layer mapped to the MR set via a spatial mapping set to front plate.
添加一个Virtual lineup层,将其映射到MR set,通过空间映射将其设为前景层
计算你视频的延迟
a. Determine the video receive delay value using the delay calibration editor in the MR set.
使用MR set中的延迟校准编辑器确定视频的接受延迟值
b. Add MR set and cameras to the delay calibration editor.
将MR set与摄像机添加到延迟校准编辑器
c. Click Capture and once completed select the single white frame from the delay calibration editor, if this does not happen, check the system is correctly Genlocked.
点击Capture,一旦完成后从延迟校准编辑器中选择单个白色帧,如果这步没有发生,检查一下系统是否正确进行了同步锁相
d.Test the screens are in sync using the Check sync tool in the delay calibration editor.
在延迟校准编辑器中使用检查同步Check sync工具测试屏幕是否都已同步
配置观察行为
a. Open the spatial calibration editor by left clicking spatial calibration from the MR set.
在MR set中右击空间校准spatial calibration打开空间校准编辑器
b. Ensure the correct MR set is selected and the camera you're calibrating is the current target.
确保选中了正确的MR set同时确保你正在校准的相机就是现在这个目标
c. Verify the camera tracking system is outputting the correct data as you test camera movements.
测试相机的移动时,验证相机追踪系统是正输出正确的数据
d. Set a real world camera position by moving the physical camera on the stage.
通过在舞台上移动物理摄像机设置真实时间摄像机的位置
e. Ensure the screens you wish to calibrate are included in the observation.
确保你想要对齐的屏幕被包含进观察行为中
f. Use the Live Blob preview to set blob size and spacing proportional to your camera lens and LED resolution.
使用实时斑点Live Blob预览设置斑点尺寸与间距,使之与你的相机镜头和LED分辨率成一定合适的比例
g. Set your base zoom position.
设置你的基本变焦位置
h. Focus the camera then lock zoom & focus if desired.
如果有需要的话,对角相机,然后锁定变焦和对角
i. Add observations. Repeat for multiple angles & positions.
继续添加观察行为,在多个角度与位置上进行重复
计算追踪延迟
a. Open delay calibration editor
打开延迟校准编辑器
b. Expand the tracker delay tab.
扩展追踪器延迟的标签
c. Open the tracking delay tool and click settings.
打开追踪延迟工具,并点击settings
d. Left click Capture to initiate a capture. This captures a set of frames whilst the camera is moving.
左击Capture以初始化一个采集。当摄像机移动时,这会采集一组帧
e. Move the physical camera along one axis.
沿着一个轴移动物理摄像机
f. The captured frames are displayed with the captured grid lines and the virtual overlay.
采集到的网格将会虚拟覆盖到采集到的帧上一并显示(virtual overlay没太整明白,暂时理解为虚拟覆盖)
g. Adjust delay tracker by selecting the numeric value until the virtual overlay and real content align.
通过选择数字值调整延迟追踪器直到虚拟覆盖与真实内容对齐
色彩校准
Please note: Perform standard colour calibration and balancing setup routines for all LED screens, cameras and lighting as required prior to running the colour calibration process in The disguise software.
请注意:在Disguise软件中运行颜色校准程序之前,根据需要对所有LED屏幕、摄像机和照明设备执行标准颜色校准和平衡设置程序。
a. Open the MR set.
打开MR set
b. Expand the calibration tab.
展开校准标签
c. Left click Colour Calibration to open the Colour Calibration editor.
左击Colour Calibration以打开色彩校准编辑器
d. Add cameras to the calibration. It is possible to calibrate a single camera, or multiple cameras together.
将摄像机添加到校准中。可以校准单个摄像机,也可以一起校准多个摄像机。
e. Left click Capture, in the pre-calibration tab.
在预校准标签pre-calibration中左击Capture
f. Increase frames per test until pure colours are represented in the preview.
在每次测试增加帧数,直到预览中出现纯色。
g. In the calibration tab, select the number of colour steps to capture.
在校准标签中,选择要采集的颜色步数。
h. Left click run.
左击运行
RenderStream is the proprietary disguise protocol for controlling third party render engines from The disguise software. This topic covers the r18 implementation of RenderStream including the Cluster Rendering functionality.
RenderStream是Disguise专有的协议,用于控制Disguise软件中的第三方渲染引擎。本主题覆盖RenderStream的r18实现,包括集群渲染功能。
Warning: The cluster rendering functionality is not supported across multiple render node types.
警告:集群渲染功能不支持跨多个渲染节点类型
This topic is intended to outline the basic steps involved in creating and assigning content to RenderStream sources. Once the configuration steps in this topic are complete, sequencing of the third party render engine can be accomplished via the RenderStream layer.
本主题旨在概述创建内容并将其分配给RenderStream 源所涉及的基本步骤。一旦本主题中的配置步骤完成,第三方渲染引擎的排序就可以通过RenderStream 层来完成。
The current implementation of RenderStream is to allow sequencing and sharing of content from the third party render engine to The disguise software, much like how Notch works onboard a gx, albeit running on an external machine.
RenderStream的当前实现是允许排序和共享从第三方渲染引擎到Disguis的内容,很像Notch在gx上的工作方式,尽管是运行在外部机器上。
The RenderStream plugins for Unity & Unreal Engine are available in the downloads centre.
Unity和Unreal引擎所要的RenderStream插件可以在下载中心找到
RenderStream Uncompressed requires the use of a 25GbE network interface to stream uncompressed, 10bit video data. 25GbE network interfaces are currently only available on vx machines. To test RenderStream Uncompressed appropriately, access to multiple machines and the networking equipment specified is required. Testing RenderStream Uncompressed also requires both a RenderStream Send License and a RenderStream Uncompressed License.
RenderStream Uncompressed需要使用25GbE的网络接口来流式传输未压缩的10位视频数据。25GbE网络接口目前仅在vx机器上可用。要适当地测试RenderStream Uncompressed,需要访问多台机器和指定的网络设备。测试RenderStream Uncompressed 还需要RenderStream 发送许可证和RenderStream Uncompressed许可证。
RenderStream Compressed uses NDI to stream compressed, 8bit video data. Testing with NDI can be done locally and therefore no additional machines or networking equipment is required. Also, no licenses are needed for testing NDI; however, a watermark will be present.
RenderStream Compressed使用NDI流式传输压缩的,8位视频数据。NDI的测试可以在本地进行,因此不需要额外的机器或网络设备。此外,测试NDI不需要许可证;但是会有水印。
Please note: RenderStream output streams can take a short amount of time to be created.
请注意:RenderStream输出可能需要很短的时间来创建。
Please note: When RenderStream output streams are not in use no changes will be recorded and they will run at 0fps to mitigate any drain on resources.
请注意:当RenderStream输出不使用时,不会记录任何更改,它们将以0帧/秒的速度运行,以减少资源消耗。
Please note: When adding a plugin to a UE/Unity project, it is important that it is placed in the correct location and that the folder containing the plugin files is named correctly otherwise the engine may crash:
请注意:向UE/Unity项目添加插件时,请务必将其放置在正确的位置,并且包含插件文件的文件夹应该正确地命名,否则引擎可能会崩溃:
在UE中的命名方式: PROJECT_ROOT/Plugins/DisguiseUERenderStream.
在Unity中的命名方式: PROJECT_ROOT/Assets/DisguiseUnityRenderStream.
Please note: Plugins are not hot swappable. If you are required to update your plugin then it is important that you remove all references to the old one within the project otherwise spurious errors will be thrown.
请注意:插件不可热插拔。如果你需要更新你的插件,那么重要的是你要删除项目中对旧插件的所有引用,否则将会抛出逻辑错误。
In UE: delete RenderStreamMediaOuput from the Content Browser and then recreate it. You will then need to adjust the Blueprint accordingly.
在UE中:从内容浏览器中删除RenderStreamMediaOuput,然后重新创建它。接着,你需要相应地调整蓝图。
In Unity: remove the DisguiseRenderStream component from any camera that may be using it and then reapply it.
在Unity中:从任何可能使用它的相机中移除DisguiseRenderStream组件,然后重新应用它。
Notch_Host is a secondary application that is included as part of the main installation process. The purpose of this application is to load Notch blocks externally to The disguise software and create RenderStream output streams which can be accessed by all machines across the same network.
Notch_Host是作为主安装过程的一部分包含的辅助应用程序。该应用程序的目的是将Notch Block从外部加载到Diguise,并创建RenderStream输出流,同一网络上的所有机器都可以访问这些输出流。
Notch_Host testing can be conducted locally as data is delivered through NDI and therefore no special network hardware is required.
Notch_Host测试可以在本地进行,因为数据是通过NDI传送的,因此不需要特殊的网络硬件。
将Notch Block放到C:\Users\USERNAME\Documents\Renderstream Projects,如果你在使用RX硬件系统,则可以放到D:\Renderstream Projects
a. The Asset discovery system searches all sub-directories so you can place all Notch blocks in an aptly named "Notch" folder.
资产发现系统可以搜索所有的子目录,所以你可以把所有的Notch Block都放到一个名叫“Notch”的文件夹中
创建一个新的RenderStream层
a. Add a new camera to the stage.
b. Create a new Camera Plate/Spatial mapping.
c. Add the camera to the mapping.
对于基于相机的映射:
a.添加一个新的相机到舞台
b.创建一个新的Camera Plate或Spatial映射
c.将这个相机添加到映射中
选中Asset并选择你的Notch Block
a. Set Source Machine to the machine with the asset (used for syncing content).
右击Asset以打开它的编辑器
a.将源机器Source Machine设置为带有资产的机器(用于同步内容)
选中集群池Cluster pool,并创建新的集群
a. Add the desired machines.
在集群池中:
a.添加所需要的机器
选中集群分配器Cluster assigner并创建一个新的多通道集群分配器MultiChannelClusterAssigner.
a. Select the Asset.
b. Select Create Channels.
c. Within each Channel’s Cluster Assigner and/or the default Cluster Assigner:
i. Select the distribution strategy and video transport options (changes to transport settings require the workload to be restarted).
在多通道集群分配器中:
a.选中所要的资产
b.选中创建通道Create Channels
c.在每个通道的集群分配器中,或默认集群分配器中:
i.选择分发策略与视频传输选项(对传输设置的变化需要重新启动工作负载workload)
a. Select Create Channels.
b. Assign one or more Mapping (regular disguise mapping) to each Channel (e.g. frontplate). Each unique Channel-Mapping combination creates a new workload.
展开Default separator,并右击MultiChannelMap以1打开它的编辑器
a.选择创建通道
b.分配一个或多个映射(常规的Disguise映射)到每个通道(例如前景板)。每个独特的通道与映射的结合都会创建一个新的workload
a. If the machines in the cluster pool do not have the content or the project has changed, press Sync.
b. Ensure all Sync Tasks are marked completed.
c. Left click Start.
d. Wait for Workload status to switch to Running.
右击Workload以打开它的编辑器
a.在集群池中的机器没有内容或项目被变更,按下Sync
b.确保所有的Sync Tasks都被标记完成
c.左击Start
d.等待Workload状态切换到Running
Unity is a third-party game engine that can be used to create 3D scenes. Unity projects can be adapted such that they create RenderStream output streams using disguise's Unity plugin. This plugin supports both camera and non-camera based mappings. Unlike Unreal Engine, a professional license is required when working in Unity.
Unity是第三方游戏引擎,可以用来创建3D场景。Unity项目可以进行改动,以使用Disguise的Unity插件创建RenderStream输出。这个插件支持基于摄像机和非摄像机的映射。不像虚幻引擎,需要在有专业版许可证的Unity中才能使用这个插件。
找到Projects并选中New
选中一个项目模板(例如带有附加功能的3D)
为该项目命名并选中Create
打开项目文件夹,并将插件放进“Assets”文件夹
a. Set Architecture to x86_64.
选择文件并选择Build Sttings:
a.将系统结构设置为x86_64
a. Set Api Compatibility Level to .NET 4.x.
找到Player Settings和Other Settings:
a.将API兼容级别设置为 .NET 4.x
或者,设置游戏对象通道可见性:
b. Tags and Layers and Layers.
c. Give any empty User Layer a name.
d. Select any object from the scene
e. Set Layer to your newly defined Layer from the Inspector panel.
f. Select your Camera(s)
g. Select whether or not you want the Camera(s) to see the objects in your newly defined Layer by opening the Culling Mask dropdown from the Inspector panel.
a.编辑,然后找到Project Settings……
b.Tags and Layers和Layers
c.给任意一个空的User Layer命名
d.从改场景中选择任意对象
e.从检视器面板中将层设置为你新定义的层
f.选中你的相机
g.在检视器面板中通过打开Culling Mask的下拉菜单,选择是否希望相机看到你新定义的层中的对象
构建Unity项目
保存并关闭Unity
创建一个新的RenderStream层
对于基于相机的映射:
b. Create a new Camera Plate/Spatial mapping.
c. Add the camera to the mapping.
a.在舞台中加入一个新的相机
b.创建一个新的Camera Plate/Spatial映射
选中Asset,并选择你的Unity可执行文件
a. Set Source Machine to the machine with the asset (used for syncing content).
右击资产以打开它的编辑器
a.将带有资产的机器设置为源机器Source Machine(用于内容的同步)
选中集群池并创建一个新的集群
在集群池中加入所需要的机器
选中集群分配器,并创建一个新的多通道集群分配器
在多通道集群分配器中:
b. Select Create Channels.
c. Within each Channel’s Cluster Assigner and/or the default Cluster Assigner:
i. Select the distribution strategy and video transport options (changes to transport settings require the workload to be restarted).
a.选中Asset
b.选中Create Channels
c.在每个通道的集群分配器中或默认集群分配器中:
i.选中分配策略与视频传输选项(改变传输设定需要重启workload)
a. Select Create Channels.
b. Assign one or more Mapping (regular disguise mapping) to each Channel (e.g. frontplate). Each unique Channel-Mapping combination creates a new workload.
展开Default separator并右击MutiChannelMap以打开它的编辑器:
a.选中Create Channels
b.为每个通道(例如前景板)分配一个或多个映射(常规的Disguise映射)。每个独特的通道与映射的结合都会创建一个新的workload
a. If the machines in the cluster pool do not have the content or the project has changed, press Sync.
b. Ensure all Sync Tasks are marked completed.
c. Press Start.
d. Wait for Workload status to switch to Running.
右击Workload以打开它的编辑器:
a.如果在集群池中的机器没有内容或项目被改变了,按下Sync
b.确保所有的Sync Tasks都被完全标记了
c.按下Start
d.等待Workload的状态切换为Running
The Unity plugin allows you to expose certain options for each component of an object available within the scene. These options will be presented as parameters within the RenderStream layer in the disguise software. Modifying the value of a parameter in turn changes the value of the corresponding option in Unity thus altering the options of the selected object within the scene.
这个Unity插件允许你为场景中可用对象的每个组件暴露某些选项。这些选项会在Disguise的RenderStream层中以参数的形式呈现。修改这些数值会改变在Unity中相应选项的数值,从而改变场景中所选对象的选项
a. Select an object from within the scene (e.g. any light source).
b. Select ‘Add Component’ at the bottom of the Inspector panel.
c. Add the ‘Remote Parameters’ component.
d. Drag and drop the component you wish to expose (e.g. Light) into the ‘Exposed Object’ field.
e. Expand the ‘Fields’ separator.
f. Select all options you wish to expose (e.g. Colour and Intensity).
在Unity中暴露一个参数:
a.从场景中选择一个对象(例如,任何光源)
b.选中检视器面板底部的“Add Component”
c.添加“Remote Parameters”组件
d.将你想要暴露的组件(例如,灯光)拖入“Exposed Object”字段
e.展开“Fields”分隔符
f.选中所有你想要暴露的选项(例如颜色与密度)
创建Unity工程
保存并关闭Unity
在Disguise中打开RenderStream层并启动Workload
调整参数值
Scenes in Unity can be composed of any number of game objects which are unique to that scene (by default). The Unity plugin offers two forms of multi-scene support:
Manual - this option restricts the disguise software's control of scenes and instead merges all Channels and remote parameters into a single scene.
Selection - this option allows scenes to be controlled from inside the disguise software; Channels are merged into a single list (duplicates removed) and remote parameters are per-scene.
Unity中的场景可以由任意数量的游戏对象组成,这些游戏对象(在默认情况下)对场景而言都是唯一的。Unity插件对多场景的支持有两种形式:
手动式——该选项限制了Disguise对场景的控制,而是将所有的通道和远程参数合并到一个场景中
选择式——这个选项允许从Disguise软件内部中控制场景;通道都被合并进一个单一列表中(重复的会被删除)并且每个场景都有远程参数
a. Open the Kebab menu for your current scene in the Hierarchy panel.
b. Select Add New Scene.
c. Optionally, populate scene with your desired game objects and exposed parameters.
创建一个新场景:
a.在层级面板中打开你当前场景的Kebab菜单
b.选中Add New Scene
c.或者,用你想要的游戏对象和暴露的参数值填充场景
从项目面板中选择Resource,然后选择DisguiseRenderStreamSettings
相应地设置Scene Control选项
构建Unity项目
保持并关闭Unity
在Disguise中打开RenderStream以启动Workload
就像你通常的排序工作一样调整场景参数
The Unity plugin offers Timecode support. This means that if any game object has a ‘Playable Director’ component and is animated using timeline functionality, it will be reflected in the disguise software timeline.
Unity插件提供时间码支持。这意味着如果任何游戏对象有一个“Playable Director”组件,并且使用时间线功能组织动画,它会被反映到Disguise时间线中
a. Select Window followed by Sequencing followed by Timeline.
b. Optionally, move the Timeline Window from the main panel to the bottom panel (i.e. drag and drop Timeline Window next to Console Window).
c. Select an object from within the scene (e.g. any user placed prop).
d. Click the Create button within the Timeline Window.
e. Save the new Timeline.
f. Hit the Record button on the newly created Animator for the chosen object within the Timeline.
g. Add an initial keyframe by right-clicking on any animatable property of the object (e.g. Position) and select Add Key.
h. Move the Playhead along the Timeline.
i. Modify your chosen property either by using the 3D controls within the Scene or by updating the value directly from within the Inspector panel (a keyframe will be added automatically when a value is changed).
j. Hit the Record button again to stop recording.
k. Return the Playhead to the beginning of the Timeline and play the sequence to confirm your animation is correct.
l. With the object still selected, select Add Component at the bottom of the Inspector panel.
m. Add the Time Control component.
在Unity中为一个对象添加时间控制:
a.依次选择Window,Sequencing,Timeline
b.或者也可以将时间线窗口从主面板移动到底部面板(也就是,将时间线窗口拖动到控制台窗口旁边)
c.从场景中选中一个对象(例如,任何用户放置的道具)
d.点击时间线窗口底部的Create按钮
e.保存这条新的时间线
f.在时间线中,为选中的对象在新创建的动画器中点击的Record按钮
g.右击对象任意可以动画的属性(例如,位置)以添加一个初始关键帧,同时选择Add Key
h.沿着时间线移动播放头
i.也可以通过场景中的3D控制或直接从检视器面板中更新数据来调整你所选择的属性(当数值被改变时会自动加入一个关键帧)
j.再次点击Record按钮以停止录制
k.将播放头拖回时间线的开始处,播放这个序列以确认你的动画没有问题
l.在该对象依然选中的情况下,在检视面板底部选择Add Component
m.添加时间控制Time Control组件
构建Unity工程
保存并关闭Unity
在Disguise中打开RenderStream层并开启Workload
在Disguise中播放你的时间线
Warning:When launching a Unity executable for the first time, a Windows Firewall popup will appear. If the executable is not allowed through the firewall,the disguise softwarewill not be able to receive the RemoteStream.
警告:当第一次启动Unity可执行文件时,将出现一个Windows防火墙弹窗。如果不允许可执行文件通过防火墙,Disguise将无法接收远程流RemoteStream。
Warning: Unity assets can only be split across multiple nodes when using 3D Mappings (i.e. Camera Plate or Spatial). Attempting to split using a 2D Mapping will not work; all nodes will render the entire frame.
警告:Unity资产只能在使用3D映射时将其于多个节点上进行拆分(即,Camera Plate或Spatial)。尝试使用2D映射进行拆分将不起作用;所有节点将渲染整个帧。
向Unity项目添加插件时,重要的是要将其放置在正确的位置,并且包含插件文件的文件夹要命名正确,否则引擎可能会崩溃。
在Unity中正确的位置与命名是:PROJECT_ROOT/Assets/DisguiseUnityRenderStream.
在Unity中,没有必要将Disguise RenderStream脚本附加到相机上。相机将在资产启动时自动配置。
当在Unity中使用“手动式”场景选择选项时,所有已构建场景中的游戏对象都不会出现在“默认”场景中。为了合并场景和/或动态加载/卸载它们,必须使用自定义脚本。
“默认”场景将会是Unity构建选项build options的“Scenes In Build”表中的第一个索引场景。
来自所有场景中的已暴露参数依然会显示在Disguise中,即使来自所有已构建场景中的游戏对象还没有合并到“默认”场景中
当在Unity中选用“选择式”时,游戏对象与已暴露的参数对每个场景来说都是唯一的
Unity模板中包含的游戏对象可能无法通过时间码进行控制。这是Unity中的问题而不是Disguise脚本的问题
如果正在尝试使用Unity的高清渲染管线(HDRP):
“Windows 10 SDK”和“Game Development with C++”模块都必须作为Visual Studio安装的一部分安装。
构建可执行文件时,“脚本后端Scripting Backend”必须设置为“Mono”。
Unreal Engine (UE) is a third-party game engine that can be used to create 3D scenes. Unreal projects can be adapted such that they create RenderStream output streams using disguise’s UE plugin. This plugin contains several components that enable both camera based mappings with tracking as well as non-camera based (2D) mappings (e.g. direct).
虚幻引擎(UE)是一款可以用来创建3D场景的第三方游戏引擎。UE的项目可以进行修改,以使用Disguise的UE插件创建RenderStream输出流。这个插件包含几个组件,既支持基于摄像机追踪的映射,也支持非基于摄像机的(2D)映射(例如,直接映射)。
Create and configure the Unreal project
创建与配置UE工程
启动UE引擎
以默认设置创建一个新的“游戏”工程,并确保它被保存于:
C:\Users\USERNAME\Documents\Renderstream Projects,如果你使用的是RX硬件,也可以保存于D:\Renderstream Projects
打开项目文件夹并创建一个叫做Plugins的新文件夹
将该插件放入Plugins文件夹
重新启动UE引擎
在Place Actors面板搜索Camera
将一个新的相机拖进场景
或者也可以相应地定位Camera Actor
a. The name of the Channel in the disguise software will be the name of the camera actor, so name the camera accordingly.
b. The setting Default Visibility defines whether the camera will see most actors in the scene. This can be overridden by a Render Stream Channel Visibility component on individual actors.
通过以下任务,从Details面板为摄像机添加Render Stream Channel Definition组件:
a.通道的名字在Disguise就是Camera Actor的名字,所以直接为相应的相机命名就行了
b.Default Visibility设置定义了该摄像机是否能看见场景中的大部分Actor。这个设置可以通过被每个Actor中的Render Stream Channel Visibility组件覆写
a. Set the visibility of the Actor per-channel definition created in the previous steps.
或者,你可以从Details面板向任意场景Actor添加Render Stream Channel Visibility组件(用于在前景板和后景板之间拆分内容)
或者,要使虚幻引擎在失焦out of focus时全速运行,请导航到Edit、Editor Preference,并取消选择“Use Less CPU when in Background”选项。可以通过搜索CPU来做到这一点。
保存工程
关闭UE引擎
创建一个新的RenderStream层
a. Add a new camera to the stage.
b. Create a new Camera Plate/Spatial mapping.
c. Add the camera to the mapping.
对于基于相机的映射:
a.在舞台中加入一个相机
b.创建一个新的Camera Plate或者Spatial映射
c.将相机添加到映射中
选中Asset并选择你的UE工程
a. Set Source Machine to the machine with the asset (used for syncing content).
右击Asset以打开它的编辑器
a.将有资产的机器设置为源机器Source Machine(用于同步内容)
选择集群池,并创建一个新的集群
在集群池中,添加你所想要的机器
选中集群分配器,并创建一个新的MultiChannelClusterAssigner
a. Select the Asset.
b. Select Create Channels.
c. Within each Channel’s Cluster Assigner and/or the default Cluster Assigner:
d. Select the distribution strategy and video transport options (changes to transport settings require the workload to be restarted).
在MultiChannelClusterAssigner中:
a.选中Asset
b.选中Create Channels
c.在每个通道的集群分配器中或默认集群分配器中:
d.选中分发策略与视频传输选项(改变传输设置需要重启Workload)
a. Select Create Channels.
b. Assign one or more Mapping (regular disguise mapping) to each Channel (e.g. frontplate). Each unique Channel-Mapping combination creates a new workload.
展开Default标签,并右击MultiChannelMap 以打开它的编辑器:
a.选中Create Channels
b.为每个通道(例如,前景板)分配一个或多个映射(常规的Disguise映射)。每个唯一的通道与映射的组合都会创建一个新的Workload
a. If the machines in the cluster pool do not have the content or the project has changed, press Sync.
b. Ensure all Sync Tasks are marked completed.
c. Press Start.
d. Wait for Workload status to switch to Running.
右击Workload以打开它的编辑器:
a.如果该集群池中的机器没有内容或工程文件被改变,按下Sync
b.确保所有的Sync Tasks都被完全标记了
c.按下Start
d.等待Workload的状态切换为Running
The Unreal plugin allows you to expose variables within UE that can be used to control the parameters of the Actors within the environment. These variables will be presented as parameters within the RenderStream layer in the disguise software. Modifying the value of a parameter in turn changes the value of the corresponding variable within UE thus altering the parameter/s of the selected Actor within the scene.
UE插件允许你在UE中暴露变量,这些变量可以用来控制环境中Actor的参数。这些变量将在Disguise的RenderStream层中显示为参数。修改参数值又会改变UE中相应变量的值,从而改变场景中所选Actor的参数。
a. Click Blueprint in the Toolbar and select Open Level Blueprint.
b. Click the Add button next to Variables within the My Blueprint panel.
c. Name the variable according to the desired property (e.g. Fog Visibility).
d. Select the variable.
e. Set the Variable Type in the Details panel according to the desired property (e.g. visibility == boolean).
f. Enable Instance Editable.
g. Optionally, set Category to the name of the menu you wish the parameter to appear under in the RenderStream layer.
h. Optionally, configure ranges for the value.
i. Compile.
j. Set your desired Default Value for the variable in the Details panel.
创建并配置一个蓝图层级中的变量
a.在工具栏中点击蓝图,并选中Open Level Blueprint
b.单击My Blueprint面板中变量旁边的Add按钮
c.为需要的属性(例如,Fog Visibility)相应的变量进行命名
d.选中变量
e.在Details面板中为相应属性的变量设置好类型(例如,Visibility == boolean)
f.启用Instance Editable
g.你也可以将Category的名称设为你希望在RenderStream层下显示的参数的菜单名
h.你也可以配置值的范围
i.编译
j.在Details面板中为参数设置你所想要的默认值
a. Right-click and create an Event Tick action.
b. Return to the scene.
c. Select an Actor from the World Outliner panel (e.g. Atmospheric Fog).
d. Drag and drop the Actor into the Blueprint’s Event Graph.
e. Drag out from the blue pin (Static Mesh Actor Object Reference) on the Actor component and create any new Rendering Component Action (e.g. Set Visibility).
f. Drag out from the white pin (Exec) on the Event Tick action and connect it to the white pin (Exec) on the left-side of the Rendering Component Action.
g. Drag out from the New Component_Name pin (e.g. New Visibility) on the Rendering Component Action and create a Get Variable_Name action.
h. Compile and Save.
为变量添加一个行为:
a.右击并创建一个Event Tick行为
b.回到场景
c.从World Outliner面板(例如,Atmospheric Fog)选中一个Actor
d.将该Actor拖拽进蓝图的Event Graph
e.从Actor组件的蓝色引脚(Static Mesh Actor Object Reference)中拖出并创建任意新的Rendering Component Action(例如,Set Visibility)
f.从Event Tick行为的白色引脚(Exec)中拖出,并将其连接到左侧Rendering Component Action的白色引脚(Exec)
g.从Rendering Component Action的New Component_Name引脚拖出(例如,New Visibility)并创建一个Get Variable_Name行为
h.编辑并保存
保存并关闭UE引擎
在Disguise中打开RenderingStream层并开启Workload
像通常进行排序工作一样调整参数值
The Unreal plugin allows you to generate scenes from either Levels or Maps within a project. This functions similarly to how the ‘Effects’ parameter in Notch blocks work.
Levels/Maps in UE can be composed of any number of Actors. There are three options for deciding how scenes will be generated from your Unreal project:
UE插件允许你在一个项目中从关卡或地图生成场景。这与Notch Block中的“Effect”参数的工作原理类似。
UE中的关卡/地图可以由任意数量的Actor组成。有三个选项可以决定如何从您的虚幻项目中生成场景:
None - this offers no scene control and simply merges all Levels of your default Map into a single persistent level.
无——这不提供场景控制,只是将默认地图中的所有关卡合并为一个持久关卡persistent level
Streaming Levels - this option generates scenes from all Levels/Sub-levels within your default Map. The Actors within a Level other than the persistent level are unique to that level. The Actors within the persistent level are shared across all levels. Parameters exposed in levels other than the persistent level will only be available when the corresponding scene is chosen in the RenderStream layer. Parameters exposed in the persistent level will be available across all scenes in the RenderStream layer.
流式关卡模式——该选项从默认地图中的所有关卡/子关卡生成场景。持久关卡之外的其他关卡中的actor对于该关卡是唯一的。持久关卡中的actor在所有关卡中共享。只有在RenderStream层中选择了相应的场景时,在持久关卡以外的关卡中暴露的参数才可用。持久关卡中公开的参数在RenderStream层的所有场景中都可用。
Maps - this option generates scenes from all Maps within your project. The behaviour of Actors and exposed parameters with this option selected, is similar to that described for ‘Streaming Levels’.
地图模式——此选项从项目中的所有地图生成场景。选择此选项时,actor和曝光参数的行为与“流式关卡模式Streaming Levels”中描述的相似。
To use this functionality:
要使用这个功能
选择Edit并找到Project Settings
b. Set Scene Selector accordingly.
a.找到左侧面板中的插件、伪装渲染流Disguise RenderStream。
b.相应地设置场景选择器Scene Selector。
创建一个子关卡
b. Select any Actor from the World Outliner panel (e.g. Chair).
c. Select Window followed by Levels from the scene window.
d. Click the Levels dropdown and select Create New with Selected Actors.
e. Name the level and save.
f. Rebuild lighting if required (Unreal Engine may throw errors at this point but it will recover).
a.回到场景
b.从World Outliner面板选择任何Actor(例如,Chair)
c.从场景窗口按顺序选中Window,Levels
d.单击Levels的下拉菜单,并且选中Selected Actors中的Create New
e.为关卡命名并保存
f.如果有需要,重建光照(UE引擎也许会在这步跑出错误,但它会恢复)
保存并关闭UE引擎
在Disguise中打开RenderStream层并开启Workload
调整场景参数
The Unreal plugin offers Timecode support. This means that if any Actor animated using timeline functionality, it will be reflected in the disguise software timeline.
该UE插件提供时间码支持。这意味着任何Actor都可以用时间线功能制作动画,它会被反映在Disguise中的时间线上。
To Creating and configure a Level Sequence:
要创建并配置一个时间线排序:
打开你的UE工程
b. Click Cinematics in the Toolbar and select Add Level Sequence.
c. Name the new Level Sequence and Save.
d. In the Sequencer: click the Track dropdown and set the Actor To Sequencer and select the Actor you wish to animate.
e. Add your initial keyframe for any or all Transform properties by clicking the small + button (“Add a new keyframe at the current time”).
f. Move the Playhead along the Timeline.
g. Modify your chosen property either by using the 3D controls within the scene or by updating the value directly from within the Details panel.
h. Add another keyframe in the same manner.
i. Return the Playhead to the beginning of the Timeline and play the sequence to confirm your animation is correct.
j. Open the Sequence Display Rate dropdown (fps counter) and set the display rate to that of your Disguise project.
k. Set the Clock Source to Timecode.
l. Save the Level Sequence.
a.或者也可以添加一个你希望加上动画的Actor到你的场景中
b.在工具栏中点击Cinematics并选择Add Level Sequence
c.为这个新的Level Sequence命名并保存
d.在排序器Sequencer中:点击Tracker的下拉菜单,并设置Actor To Sequencer,同时选择你想要加上动画的Actor
e.通过单击+按钮(“在当前时间中添加一个新的关键帧”),为任意或所有Transform属性加上初始关键帧
f.沿着时间线移动播放头
g.通过场景中的3D控制或者在Details面板中直接更新数值的方式调整你所选择的属性
h.以同样的方法添加另一个关键帧
i.将播放头移回时间线起始点,并且播放该排序以确认动画内容是否正确
j.打开Sequence Display Rate下拉菜单(fps counter)并为Disguise工程设置显示帧率
k.为时间码设置时钟源Clock Source
l.保存该关卡排序Level Sequence
配置该关卡的蓝图
b. Right-click and create an Event BeginPlay action.
c. Drag out from the white pin (Exec) and add a Create Level Sequence Player action.
d. In the Level Sequence dropdown, select the Level Sequence you just created.
e. Drag out from Settings pin and add a Make MovieSceneSequencePlaybackSettings action.
f. Enable Auto Play and Pause At End.
g. Compile and Save.
a.在工具栏中点击蓝图并选择Open Level Blueprint
b.右击并创建一个Event BeginPlay行为
c.从白色引脚(Exec)拖出并添加一个Create Level Sequence Player行为
d.在Level Sequence 下拉菜单中,选择你刚刚创建的Level Sequence
e.从设置引脚中拖出,并加入一个MovieSceneSequencePlaybackSettings行为
f.启用Auto Play与Pause At End
g.编译并保存
配置项目设置
b. Navigate to Engine and General Settings in the left panel.
c. Set Timecode Provider underneath the Timecode separator to RenderStreamTimecodeProvider.
a.找到Edit与Project Settings
b.在左边的面板找到Engine与General Settings
c.设置Timecode Provider下方的Timecode为RenderStreamTimecodeProvider
如果有需要,重新构建光照(UE可能会在这步抛出异常,但它会恢复)
保存并关闭UE
在Disguise中打开RenderStream层并开启Workload
在Disguise中播放你的时间线
With some modifications to the project settings, the Unreal plugin offers live multi-user editing. If a Multi-User Server is configured and running, any additional machine on the same network as the render nodes will be able to run the project in Edit mode and make live changes. Any changes to the project made while there is an active workload will be reflected in real-time.
通过对项目设置的一些修改,UE插件提供了实时多用户编辑。如果配置并运行了多用户服务器,则与渲染节点位于同一网络上的任何其他计算机都可以在编辑模式下运行项目并进行实时更改。在workload处于活动状态时对项目所做的任何更改都将实时反映出来。
Configuring multi edit in the Unreal project:
在UE项目中配置多用户编辑
进入Edit并找到Plugins,启用Multi-User Editing插件
进入Edit并找到Project Settings
找到Plugins与Multi-User Editing
b. Set the Default Server URL to the name of the machine that will be running the Multi-User Server (e.g. “NDISPLAY-4”).
c. Set Default Session Name to something unique (e.g. “MUS”).
a.确保Enable Multi-User Toolbar Button,Auto Connect与Retry Auto Connect on Error已被启用
b.将默认服务器URL设置为作为多用户服务器运行的机器的名字(例如,“NDISPLAY-4”)
c.将默认会话名设置成唯一的(例如“MUS”)
保存并关闭UE
将调整过的项目分布到所有的节点(这步可以通过Disguise完成)
在指定的机器上启用多用户服务器Multi-User Server ,并将其指定为默认服务器URL Default Server URL(或者启用单独的UnrealMultiUserServer.exe或通过Unreal Editor,见虚幻文档)
确保该服务器在网络上可见,并且所有的节点都已连接到该服务器
在Disguise中打开RenderStream层并启动Workload
使用一个编辑器连接到Multi-User Server,并做出调整
Warning: Turning on alpha or modifying the transport configuration in any other manner for Unreal assets will cause a shader recompilation and may take a considerable amount of time before the content is visible within the disguise software. This process will be reflected within the Workload status widget.
警告:打开alpha或以其它任何方式调整UE资产的传输配置都将会导致着色器的重新编译同时也行会需要相当长的时间才能在Disguise中看到内容。这个过程将反映在Workload状态微件中
Warning: Many Unreal features will not work with nDisplay, specifically nodes that require determinism. Consult the Unreal Help guide for more information.
警告:许多UE的特性不适用于nDisplay,特别是需要确定性的节点。有关更多信息,请参考虚幻帮助指南。
When adding the plugin to an Unreal project, it is important that it is placed in the correct location and that the folder containing the plugin files is named correctly otherwise the engine may crash.
In Unreal: PROJECT_ROOT/Plugins/DisguiseUERenderStream.
将插件添加到UE项目中时,将其放置于正确的位置是非常重要的,并且包含插件的文件夹也需要正确地命名,否则会导致引擎的崩溃
在UE中的放置方式:PROJECT_ROOT/Plugins/DisguiseUERenderStream.
Unreal has multiple different methods for saving a project. When making changes to a project for use with RenderStream, it is best to close the project before attempting to start a workload. This will prompt you to save all changes to your project. If your Unreal project is not saved correctly, you may experience unexpected behaviour.
虚幻有多种不同的保存项目的方法。当对项目进行更改以便与RenderStream一起使用时,最好在尝试启动Workload之前关闭项目。这将提示你保存对项目的所有更改。如果你的UE项目保存不正确,你可能会遇到意外行为。
When using the Maps Scene Selector option, all maps within your Unreal project must be loaded in the Editor at least so that they are cached. If they are not loaded at least once, they will not appear within the scene selection.
使用“地图场景选择器Maps Scene Selector”选项时,必须至少在编辑器中加载UE项目中的所有地图,以便缓存它们。如果它们没有被至少加载过一次,它们将不会出现在场景选择中。
When using the Maps Scene Selector option, sublevels are handled differently compared to when the Streaming Levels option is selected.
使用“地图场景选择器Maps Scene Selector”选项时,子关卡的处理方式与选择“流式关卡Streaming Levels”选项时不同。
Maps will only display the Actors present within a sublevel and not include those in any parent levels.
Streaming Levels will display the Actors present within a sublevel as well as those included in any parent levels.
地图将仅显示子关卡中的Actor,不包括任何父关卡中的Actor。
流式关卡将显示子关卡中的Actor以及任何父关卡中包含的Actor。
When using the None Scene Selector option, the scene Unreal will present when a workload is started will always be the Game Default Map set within the project settings (unless otherwise specified using the Custom Options field).
使用“无场景选择器None Scene Selector”选项的情况下,当启用Workload时UE场景的呈现将会一直是项目设置中的Game Default Map集(除非Custom Options字段另有指定)
By default, Unreal automatically sets the exposure of a Map’s PostProcessVolume. This can cause the exposure of split frames to be different; in turn, revealing a noticeable seam between frames.
默认情况下,UE会自动设置地图的PostProcessVolume的曝光。这会导致分割帧split frames的曝光有所不同,反过来,两帧之间会有明显的接缝。
This can be resolved be setting the ‘Metering Mode’ of the Exposure within the Lens property of the Map’s PostProcessVolume to “Manual” and assigning an appropriate “Exposure Compensation”.
这可以通过将地图的PostProcessVolume的镜头内的曝光属性的“测光模式”设置为“手动”并指定适当的“曝光补偿”来解决。(真没太看明白)
Exposure Compensation can either be a user defined float value appropriate to the scene or a Float Curve can be applied.
曝光补偿可以是用户定义的浮点值以适应场景,也可以应用浮动曲线。
The disguise software currently does not notify the user that changes made to the PostProcessVolume have caused the project to become out of sync across the machines within the Cluster Pool. However, any changes to it must be saved and the project re-synchronised to all machines.
Disguise目前不会通知用户对PostProcessVolume 所做的更改已导致该项目在群集池内的计算机之间不同步。但是,对它的任何更改都必须保存,并且项目必须与所有机器重新同步。



 Publish
 Videos
 Articles
 Events
 EN
EN

Comments
Please Log in or Register to comment